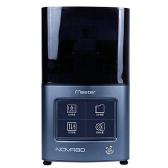
消费级
模型手办3D打印机首选,容易操作且打印表现不俗。
Need to use cura software (cura installation package links:http://pan.baidu.com/s/1qY2THko password:jnam)
The main introduction now is the usage functions of Cura software to convert 2D into 3D:
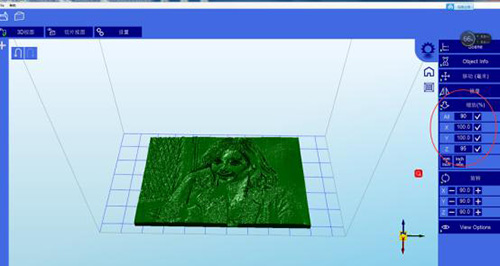
1、The relief I made is a photo of my favorite star Liu Tao.

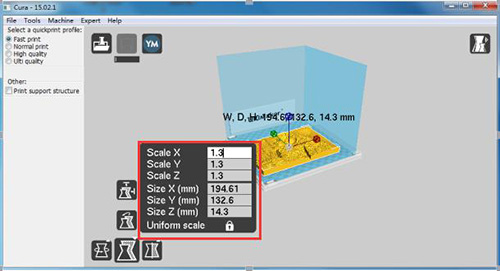
2、Open the photo in cura software, and then a parameter preset option box will pop up, including the size of the model -- depth, width and height, as well as the higher or lower of the lighter and darker. Here, I set it by the default, and you can modify the corresponding parameters according to your own needs.
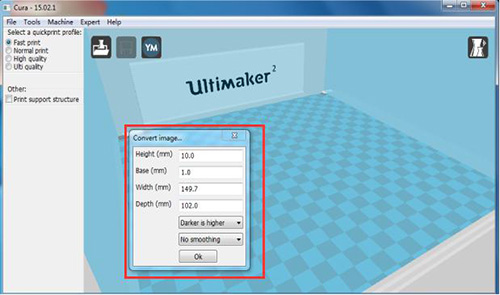
3、Special reminder: For the last parameter, it is generally recommended to choose Light Smoothing, so that the model from the image conversion will be smoother.

4、After clicking OK, the model is generated like this. It is very simple,right? You can adjust the size according to your own needs.
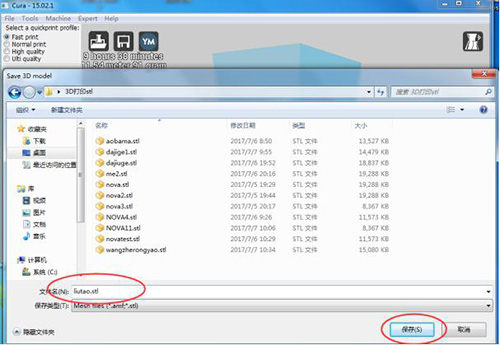
5、In this way, we get the model we want, and then you can save the model as a .stl file by using the shortcut key Ctrl + S directly. Remember to add .stl after the name of the model when saving, so that it can be opened correctly.
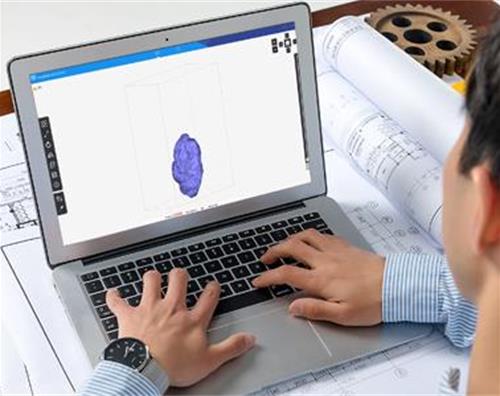
6、Next, open the .stl file with the software CreationWorkshop (CWS) of the nova3d printer, and then resize the model appropriately.
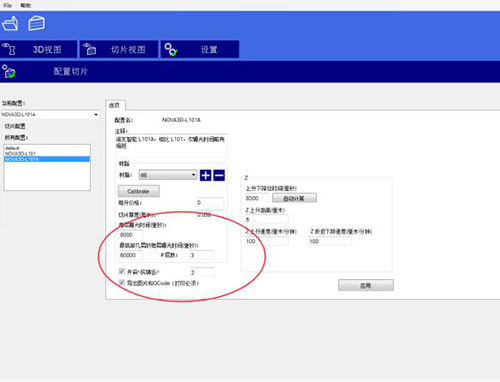
7、Set the parameters (recommended exposure time of 8 seconds for each layer and 10 seconds for the bottom 3 layers), then slice and save, and upload the file to the printer (recommended the number of embossment slicing layers is 50 to 100).
7、Set the parameters (recommended exposure time of 8 seconds for each layer and 10 seconds for the bottom 3 layers), then slice and save, and upload the file to the printer (recommended the number of embossment slicing layers is 50 to 100).

Copyright © 2025 深圳市诺瓦机器人技术有限公司 All rights reserved
粤ICP备16089255号,本网站直接或间接向消费者推荐商业产品或服务都是“广告”(包装和参数,售后保证及其他产品信息除外)